Mmmm Hot Cocoa. Did you know that there's a National Hot Cocoa Day? AND it's today!?!? That's right, December 13th is the day to celebrate Hot Cocoa. (If you missed it, no worries, I hear January 31st is National Hot Chocolate Day....sooo, just hang in there)
Today we made a fun hot cocoa mix that you can give away on your cookie platter or to a friend or teacher assistant. It would be cute with a gift card attached for a coach or Sunday School teacher, too! A lot of my "kid" crafts are ones that I've done before that I just make a little simpler for my kiddos (or, in this case, our homeschool friends) to do.
You'll need:
*A large can of hot cocoa mix (or make your own- we love Alton Brown's although for my crew I sub a pinch of cinnamon for the pinch of cayenne)
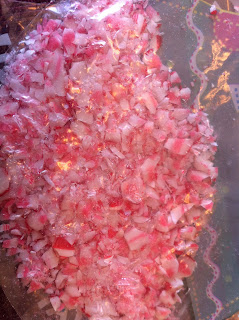
*Candy Canes. We like to use our broken ones this way. If it falls off the tree but is still wrapped, it can be repurposed!!
*White or Dark chocolate chips- the mini chips work especially well.
*Marshmallows, we like the holiday shapes!
*12x12 cardstock
*adhesive (double sided sticky tape and/or glue stick) and/or a stapler
*Embellishments (paper, stickers, stamps, ribbons)
*Tie-top bags, plain or seasonal will work just fine!
Step One, Crush:
Crushing things is very fun. We find that candy pieces tend to be very sharp and break our ziplock bags, so use two to prevent spills. Don't make the pieces too small, or you won't be able to see them in your bag!
Step Two, Fill:
Start with a 1/4 cup scoop of hot chocolate mix (or more if that's what your recipe calls for) to make one mug of cocoa. Then layer on chocolate chips, peppermint pieces, and marshmallows. Yum :) Secure your bag well.
Step Three, Cut:
You'll need a long piece of cardstock. All of mine were 12x6, but you can use what you have. Fold at about 1/2 inch from the top and then set your folded edge over the other cut end. Stand it up on the table to figure out your center folds, which will need to allow for about a 1-1.5 inch "bottom". Once you do the first one, unfold it to use as a template if your other papers are the same size.
Voila. She is the beautiful.
Step Whatever We're on, I'm sick of scrolling up- Insert chocolate:
Yup. Put it inside the now-folded paper. We stapled, but you don't have to. On ours, the staple will be covered by ribbon. You can either put the flap under or over. Side note- if you're not doing this with kids, and actually have some time, I would make them look like THIS instead of like the ones we did today :)
Step the Next- Seal and Decorate:
Note: I find it helpful to have several pre-cut shapes (like squares) so that kids don't get frustrated.
Surprise inside! Guess what's inside!! (Gingerbread Marshmallows is a way cooler prize than you get in Cracker Jacks now, anyway!)
Look! It's a mini one! It's cute, too!
Fun and quick, you could also fill these up with any home-made treat from Russian Tea Mix (but for heaven's sake, put some red-hot candies in!) to peanut brittle. It makes a simple homemade gift that much more special because you took the time to dress it up!!
Happy Crafting :)


No comments:
Post a Comment